What a Gas Furnace Installation Actually Involves (And Why It Matters)
Gas furnace installation is the process of safely removing your old heating equipment and replacing it with a properly sized, code-compliant new unit — including venting, gas line connections, electrical wiring, ductwork, and full system testing.
Here’s what the process covers at a glance:
- Pre-installation assessment — load calculation, ductwork inspection, permit acquisition
- Old unit removal — safe shutdown, gas and power disconnect, equipment disposal
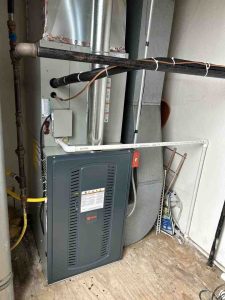
- New furnace positioning — leveling, clearances, vibration isolation
- Gas line connection — drip leg, leak testing, proper pipe materials
- Venting setup — PVC (90%+ AFUE) or double-wall metal pipe (80% AFUE)
- Electrical and thermostat wiring — power supply, control connections
- Ductwork inspection and sealing — airflow and static pressure checks
- Condensate drain setup — required for high-efficiency models
- System commissioning — combustion analysis, temperature rise, BTU input verification
- Final inspection — code compliance sign-off and homeowner walkthrough
It’s a multi-step process that typically takes 10 to 15 hours and touches your home’s gas system, electrical system, and ventilation all at once. Done right, a new furnace can last 15 to 20 years and meaningfully reduce your monthly heating bills. Done wrong, it can create safety hazards, void your warranty, and cost you far more in the long run.
I’m Richard Marcello, President of Advanced Heating & Cooling, and I’ve spent over 30 years overseeing gas furnace installations across Rhode Island — from straightforward replacements to complex new builds requiring full duct and venting upgrades. In this guide, I’ll walk you through exactly what to expect from the process so you can make confident, informed decisions.

Gas furnace installation terms simplified:
Choosing the Right System: Types and Sizing
When we sit down with a homeowner in Smithfield or Greenville, the first question is usually, “What size do I need?” Many people think they should just buy the same size as their old unit. However, if your old furnace was oversized (a common issue in older Rhode Island homes), it likely “short-cycled,” turning on and off too frequently, which wastes energy and wears out parts.
To get it right, we perform Manual J load calculations. This isn’t just a guess based on square footage. We look at your home’s insulation quality, the number and type of windows, the direction your house faces, and our specific Southern New England climate. A 2,000-square-foot home in North Smithfield might need an 80,000 BTU furnace if it’s well-insulated, while a draftier home of the same size might need more.
Understanding Furnace Types
The “stage” of your furnace determines how it delivers heat. Think of it like a car’s throttle:
| Furnace Type | How it Works | Comfort Level | Efficiency |
|---|---|---|---|
| Single-Stage | Only one speed: 100% “On” or “Off.” | Basic; can have hot/cold spots. | 80% AFUE |
| Two-Stage | Has a high and low setting (usually 65% and 100%). | Better; runs longer at lower speeds for even heat. | 90% – 96% AFUE |
| Variable-Speed/Modulating | Adjusts in tiny increments to match the exact heat loss. | Best; incredibly quiet and consistent. | Up to 98.5% AFUE |
AFUE stands for Annual Fuel Utilization Efficiency. An 80% AFUE furnace turns 80 cents of every dollar into heat, while 20 cents goes up the chimney. A 96% high-efficiency unit only wastes 4 cents. Upgrading from an old 80% model to a 96% model can save an average homeowner about $270 a year in gas costs. For more details on choosing the right tech, check out our more info about heating installation services.
The Professional Gas Furnace Installation Process
On the day of your gas furnace installation, we don’t just “swap boxes.” It is a surgical procedure for your home’s mechanical heart.
Preparation and Safety
First, we lay down floor protection. Safety is our priority, so we begin by shutting off the electrical breaker and the main gas supply valve. We also clear a workspace of at least 3 to 4 feet around the unit to ensure everything is accessible and safe.
Removing the Old Equipment
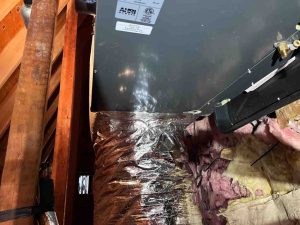
Removing the old unit involves more than muscle. We carefully disconnect the old flue pipe, gas lines, and electrical wiring. We also inspect the area for any signs of past issues, like soot marks or cracked heat exchangers, which can be common in units over 20 years old.
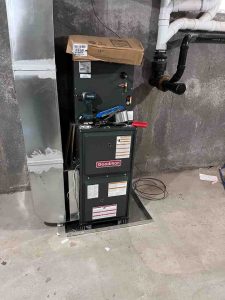
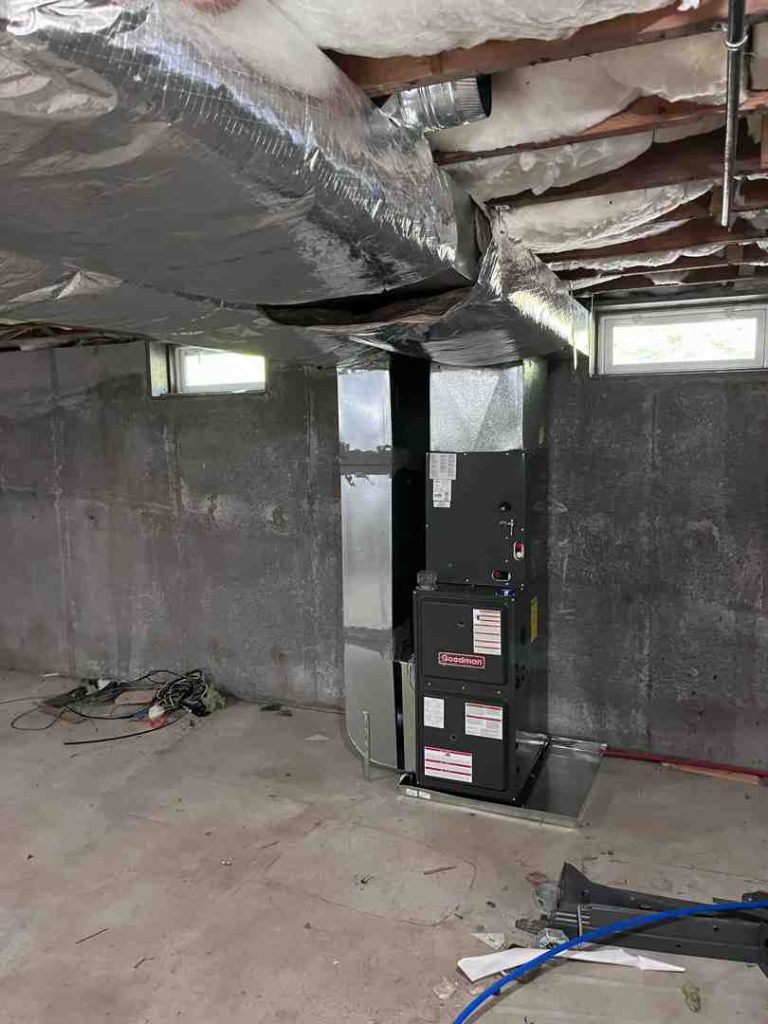
Positioning and Leveling
Once the space is clear, we bring in the new unit. Gas furnace installation requires the unit to be perfectly level. If a high-efficiency furnace isn’t level, the water it produces (condensate) won’t drain correctly, which can cause the system to shut down or even rust the internal components. We use shims and often install vibration isolation pads to keep the unit quiet, especially if it’s located near living spaces.
All our work follows NFPA 54 (National Fuel Gas Code) and the International Residential Code. We also handle the local permits required in Slaterville, Johnston, and surrounding areas. These permits are your protection—they ensure a third-party inspector verifies the job was done safely.
Technical Requirements: Venting, Gas Lines, and Airflow
This is where the “heavy lifting” of the installation happens. The way a furnace breathes and “eats” fuel determines its safety.
Venting: 80% vs. 90%+ AFUE
The venting requirements change drastically based on efficiency:
- 80% AFUE Furnaces: These produce very hot exhaust. They require double-wall metal pipe (B-vent) that usually connects to a chimney or goes straight through the roof.
- 90-98% AFUE Furnaces: These are “condensing” furnaces. The exhaust is cool enough that we use PVC drain line requirements for venting. These vents must slope back toward the furnace at a minimum of 1/4 inch per foot so the moisture can drain away.
Connecting the Gas Lines
We use black iron pipe for the main connection. A critical component we always install is a drip leg (or sediment trap). This is a small vertical pipe extension that catches debris or moisture in the gas line before it can clog the furnace’s expensive gas valve. Once connected, we use a soapy water solution or an electronic leak detector to ensure every joint is airtight.
Clocking the Gas Meter
This is a step many cut-rate installers skip, but it’s essential. We “clock” your gas meter to measure exactly how many cubic feet of gas the furnace is burning per hour. By comparing this to the local heat content of the gas, we ensure the furnace is firing within 2% of its design rating. If it’s under-firing, it won’t heat your home; if it’s over-firing, it could crack the heat exchanger. You can find more info about furnace replacement in Smithfield regarding these technical standards.
Commissioning, Testing, and Smart Controls
Once the pipes are connected, we enter the “commissioning” phase. This is the difference between a furnace that just “runs” and one that runs perfectly.
The Moment of Truth: Startup
We don’t just flip the switch and leave. We use a Sauermann Si-CA 130 Combustion Analyzer to measure the gases coming out of the vent. We check for Carbon Monoxide (CO) levels and ensure the oxygen-to-fuel ratio is correct.
Airflow and Static Pressure
We measure “static pressure”—essentially the blood pressure of your HVAC system. If your ductwork is too small for the new furnace, the blower motor will work too hard, get loud, and die young. We also test the “temperature rise,” ensuring the air coming out of your vents is exactly the right temperature (typically 35°F to 65°F warmer than the air going in).
Smart Thermostat Integration
Modern gas furnace installation usually includes a thermostat upgrade. Smart thermostats can learn your habits and save you an additional 10-15% on heating costs. We ensure the wiring (R, W, G, Y, and the “C” common wire) is done correctly so your new tech has constant power. If you’re wondering when is it time to replace your HVAC system?, looking at your thermostat’s ability to communicate with your furnace is a great place to start.
Costs, DIY Risks, and Long-Term Maintenance
Let’s talk numbers. A professional gas furnace installation typically ranges from $3,800 to $12,000. Why the big range? It depends on the efficiency of the unit, whether we need to run new PVC vents through your foundation, and if your ductwork needs resizing.
The Real Cost of DIY
We strongly advise against DIY furnace installation. While it might seem like you’re saving $1,500 in labor, the risks are immense:
- Safety: Gas leaks and Carbon Monoxide poisoning are life-threatening.
- Warranty: Most manufacturers (like Carrier or Goodman) will void your warranty if the unit isn’t installed by a licensed professional.
- Efficiency: Without a combustion analyzer and a manometer, you cannot set the gas pressure or airflow correctly, meaning your 96% furnace might only perform like an 80% model.
Long-Term Care
A well-maintained furnace lasts 15-20 years. A neglected one can see its lifespan cut in half and its energy bills rise by 30-50%.
- Change filters monthly: A clogged filter is the #1 cause of furnace “limit switch” trips.
- Annual Maintenance: We check the heat exchanger for cracks and clean the burners to ensure a clean flame.
- Monitor CO Detectors: Always have a working Carbon Monoxide detector on every floor.
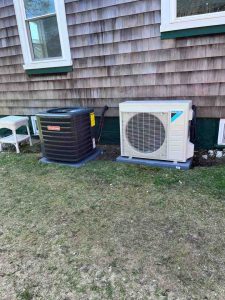
If you are considering alternatives, you might want to look at our heat pump vs traditional furnace comparison.
Frequently Asked Questions about Gas Furnace Installation
How much does a gas furnace installation cost?
The total cost usually lands between $3,800 and $12,000. This includes the equipment, labor (usually $50–$100 per hour), permits, and materials like venting and gas piping. High-efficiency models have a higher upfront cost but lower monthly bills.
Can I DIY a gas furnace installation?
Technically, some homeowners try, but we highly discourage it. In Rhode Island, local codes often require a licensed professional for gas connections. Beyond the legalities, the risk of fire, explosion, or CO leaks makes it a dangerous project for an amateur.
How long does the installation process take?
A standard gas furnace installation takes about 10 to 15 hours. A simple “change-out” might be done in a day (8 am to 4 pm), but if we are switching from an 80% to a 95% unit (requiring new PVC vents) or modifying ductwork, it can take two days.
Conclusion
At Advanced Heating & Cooling, we believe that the quality of the installation is just as important as the brand of the furnace. Serving Smithfield, Esmond, Greenville, and the surrounding Rhode Island communities for over 30 years, we’ve seen what happens when shortcuts are taken—and we refuse to take them. From the initial Manual J load calculation to the final combustion analysis, our goal is to provide you with a system that is safe, quiet, and incredibly efficient.
Ready for a warmer, more efficient home? Schedule your professional gas furnace installation today and get a free, honest estimate from our local experts.