Understanding Furnace Venting Fundamentals
#
Direct vent furnace installation is a critical step toward a safe and efficient home heating system. Unlike older furnaces that use indoor air, a direct vent unit uses a sealed two-pipe system. One pipe draws fresh air from outside for combustion, and the other safely expels exhaust gases, like carbon monoxide, back outdoors. This design protects your family’s health and helps your furnace run at peak efficiency, saving you money on energy bills. Due to the complexity of gas lines, electrical work, and strict codes, professional installation is essential.
I’m Richard Marcello. As President of Advanced Heating & Cooling, I’ve spent over 30 years ensuring reliable and safe direct vent furnace installation for homeowners and businesses across Rhode Island. This guide shares practical knowledge from my team and me.

Key terms for direct vent furnace installation:
The fundamental principle of furnace venting is to safely remove harmful combustion byproducts (like carbon monoxide) and supply fresh air for the burning process. Without proper venting, these dangerous gases could accumulate in your home. A sealed combustion system ensures the air for combustion is drawn from outside and exhaust is expelled outdoors, never mixing with your indoor air. This minimizes CO exposure, maximizes your furnace’s efficiency (AFUE), and prevents moisture buildup that can cause mold and structural damage.
Why Proper Venting is Non-Negotiable
Proper furnace venting is a critical safety and efficiency requirement. The primary reason is to prevent deadly, odorless carbon monoxide (CO) from entering your home. A blocked, cracked, or improperly installed vent can lead to a dangerous CO leak.
Beyond safety, proper venting directly impacts your furnace’s performance. A well-vented furnace operates more efficiently, leading to lower energy bills and a longer lifespan. It also ensures that moisture produced by high-efficiency furnaces is drained correctly, protecting your home and equipment from rust and corrosion. Regular maintenance, as outlined in The Benefits of Regular Heating System care, is key to keeping your venting system in top shape.
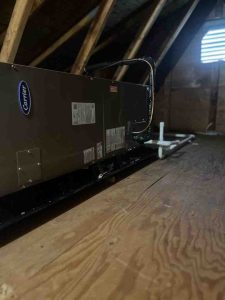
Essential Components of a Direct Vent System
A direct vent system relies on several key components working together:
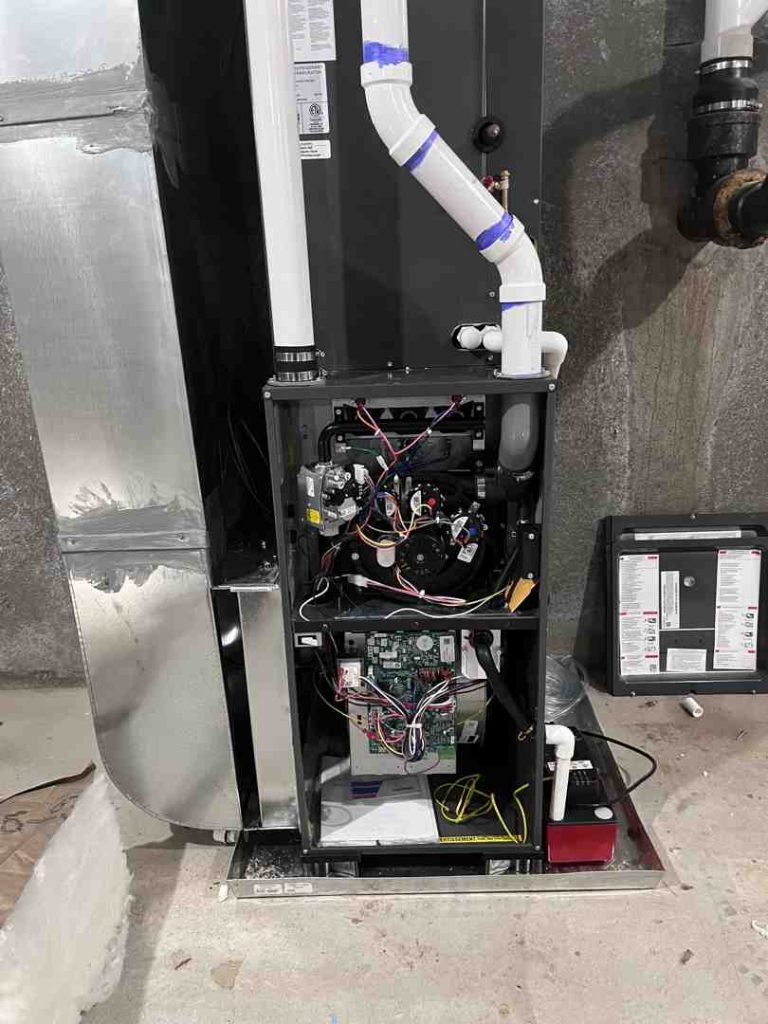
- Vent Pipes (Intake and Exhaust): The signature two-pipe system. One draws fresh outdoor air for combustion, and the other expels exhaust gases. This sealed process improves safety by not using indoor air.
- PVC/CPVC Materials: High-efficiency furnaces have cooler exhaust, allowing for the use of durable, corrosion-resistant PVC or CPVC pipes. The furnace manual specifies the exact material and diameter required.
- Vent Terminal/Cap: The cap on your home’s exterior that covers the pipe ends. It prevents debris, rain, and animals from entering while allowing proper airflow and maintaining clearances.
- Condensate Drain Line: High-efficiency furnaces produce acidic water (condensate) that must be drained. This PVC line carries the liquid from the furnace to a suitable drain, incorporating a trap to block exhaust gases.
- Draft Inducer Motor: A fan that pulls combustion air in and pushes exhaust gases out. This forced draft ensures consistent and efficient operation.
- Sealants and Primers: All pipe joints must be airtight. Specific primers and cements for PVC/CPVC create leak-proof connections, preventing gas leaks.
For more information about how these components come together, explore More info about our HVAC services.
A Step-by-Step Guide to Direct Vent Furnace Installation
Direct vent furnace installation is a complex process that demands precision and adherence to safety codes. Due to gas lines, electrical connections, and critical venting, this is not a DIY project. Improper installation can void your warranty and create dangerous conditions like carbon monoxide leaks. Professional installation by a licensed technician is paramount for your safety. We specialize in Heating Installation in Smithfield, RI, and surrounding areas, ensuring every step is performed to the highest standards.
Phase 1: Pre-Installation Planning and Preparation
Meticulous planning is the cornerstone of a successful direct vent furnace installation. This phase ensures a smooth, safe, and code-compliant setup.
- Essential Tools and Materials: A professional installation requires specialized tools like manometers for gas pressure testing and CO detectors, along with the furnace, proper vent pipes (PVC/CPVC), terminals, drain lines, gas fittings, and electrical wiring.
- Checking Local Building Codes: Every town, from Smithfield to Johnston, has specific codes for furnace installation, covering everything from clearances to vent materials. We ensure every installation meets or exceeds all local Rhode Island codes.
- Obtaining Permits: Most installations require a permit from your local building department to ensure the work is inspected and verified for safety. We manage this process for our clients.
- Choosing the Furnace Location: The right location impacts efficiency and safety. We consider proximity to exterior walls for venting, adequate space for service access, and protection from freezing for the condensate drain.
- Calculating Clearances: This is a critical safety step. Clearances are the minimum required distances between the furnace and combustible materials (wood, drywall). For detailed manufacturer specifications, you can refer to technical manuals like this one from Rinnai. For example, a vent terminal typically needs to be at least 12 inches above ground and 18 inches from windows.
- Wall Thickness: The exterior wall’s thickness determines if standard vent kits or extensions are needed to ensure the terminal is secure and properly sealed.
- Sizing the Furnace for Your Home: An improperly sized furnace wastes energy. We perform a detailed BTU heat loss calculation to determine the perfect furnace size for your home, ensuring optimal comfort and efficiency. Learn more in our guide on HVAC System Size.
Phase 2: The Core Direct Vent Furnace Installation Process
With planning complete, we move to the hands-on installation, where our expertise ensures every connection is perfect for safe, efficient operation.

- Cutting the Vent Holes: We use specialized hole saws to cut clean, precisely measured openings in the exterior wall for the intake and exhaust pipes.
- Routing the Intake and Exhaust Pipes: Vent pipes are carefully routed from the furnace to the outside. We ensure the shortest, straightest runs possible to minimize airflow restriction.
- Maintaining Proper Slope for Drainage: The exhaust pipe for a high-efficiency furnace must be sloped (typically 1/4 inch per foot) to allow condensate to drain properly, preventing water accumulation and damage.
- Sealing All Joints and Connections: Every joint is sealed with specific primers and cements (for PVC) or high-temperature sealants to create a permanent, airtight bond, preventing CO leaks.
- Installing the Exterior Vent Terminal: The vent cap is securely fastened and weather-sealed to the exterior wall, maintaining all required clearances from windows and other openings.
- Connecting the Condensate Drain: The drain line is connected from the furnace’s trap to a proper drain, sloped to allow gravity to carry the acidic water away. In unheated spaces, the line may be insulated to prevent freezing.
- Gas Line Connection and Leak Testing: A licensed professional connects the furnace to the gas supply, installing a shut-off valve and sediment trap. We then perform a rigorous leak test on every connection using a soap solution.
- Electrical Wiring: Our electricians connect the furnace to your home’s electrical system, ensuring proper grounding and adherence to all codes, including a service disconnect switch.
Phase 3: Post-Installation Checks and First-Time Operation
Once installed, we perform critical checks to ensure your new system runs perfectly and safely.
- Priming the Condensate Trap: We prime the trap with water to create a seal that prevents exhaust gases from escaping through the drain line.
- Checking for Gas Leaks with Soap Solution: We re-verify all gas connections with a soap solution to ensure they are 100% gas-tight.
- Verifying Electrical Connections: We double-check all wiring for secure connections, correct polarity, and proper grounding.
- Initial Furnace Start-Up Sequence: We initiate the first start-up, watching the igniter, burners, and draft inducer motor to ensure a smooth and correct sequence.
- Checking for Proper Flame: We observe the burner flame, which should be a clear blue, to ensure optimal and efficient combustion.
- Observing the Full Heating Cycle: We let the furnace run a full cycle to confirm all components work in harmony, from the thermostat call to the final shutdown.
This meticulous process ensures your new furnace is tuned for peak performance and safety. Learn more in our guide on Mastering Your Comfort: Expert Furnace Setup in Smithfield.
Safety, Maintenance, and Performance
The journey of your direct vent furnace doesn’t end with installation. Ongoing safety measures and routine maintenance are essential for years of reliable, efficient heating. Proactive care is key to The Importance of Regular Heating Maintenance.
Preventing Carbon Monoxide and Gas Leaks
Preventing carbon monoxide (CO) and gas leaks is paramount. While direct vent furnaces are inherently safer, vigilance is still required.
- CO Detector Placement and Testing: Install CO detectors on every level of your home, especially near sleeping areas. Test them monthly, replace batteries annually, and replace the entire unit every 5-7 years.
- Signs of a CO Leak: Since CO is invisible and odorless, detectors are crucial. Physical symptoms like headaches, nausea, or dizziness in multiple household members can also be a sign.
- Signs of a Gas Leak: Natural gas is odorized with a “rotten egg” smell. Also listen for a hissing sound near gas lines.
- What to Do if You Smell Gas: If you suspect a gas leak, act immediately:
- Do not use any electrical switch or phone in your building.
- Extinguish any open flames.
- Evacuate everyone from the building immediately.
- Once safely outside, call your gas supplier from a neighbor’s phone or call the fire department.
This is a true emergency. We are here to help with Emergency Heating Services: System Fails.
- Importance of Sealed Vent Pipes: The sealed vent system is its greatest safety feature. Any cracks or loose connections can allow exhaust gases to leak. Regular inspection is vital.
Routine Maintenance for a Healthy Venting System
Your furnace and its venting system require routine maintenance to operate safely and efficiently.
- Annual Professional Inspection: We recommend an annual inspection by a qualified HVAC professional before the heating season. Our technicians will inspect the entire system for wear, damage, and blockages. This is part of our Heating System Maintenance program.
- Keeping Vent Terminals Clear: Regularly check the exterior vent terminal for obstructions like snow, leaves, or nests. A blocked vent can cause the furnace to shut down.
- Cleaning Air Filters: Check your furnace’s air filter monthly and replace or clean it every 1-3 months. A dirty filter restricts airflow and reduces efficiency.
- Inspecting Pipes for Cracks or Corrosion: Visually inspect visible vent pipes for cracks, rust, or loose connections. Soot marks around joints could indicate a leak.
- Insulating Pipes in Unconditioned Spaces: If vent pipes run through an unheated space like an attic or crawlspace, insulating them can improve efficiency and prevent condensation issues.
Troubleshooting Common Furnace Issues
Even with a professional direct vent furnace installation, issues can occasionally arise. Knowing common problems can help you decide when to call a professional. When something feels off, our team is ready to assist with Smithfield, RI Heating Repair 101.
Common Issues During a Direct Vent Furnace Installation
Our experienced technicians are prepared to handle common installation hiccups to ensure a flawless result:
- Blocked Vents: We perform thorough checks to ensure pipes are clear of debris before sealing the system.
- Improper Slope: We use levels to guarantee the correct pipe slope for proper condensate drainage, preventing shutdowns.
- Leaky Pipe Joints: Our rigorous soap solution leak test identifies and allows us to fix any imperfectly sealed joints.
- Incorrect Pipe Sizing: We strictly follow manufacturer specifications for pipe diameter and length to ensure proper furnace operation.
Basic Troubleshooting After Installation
If you encounter an issue with your furnace, here are a few basic checks you can perform before calling for service.
- Furnace Won’t Ignite:
- Check the circuit breaker and furnace power switch.
- Ensure the thermostat is set to “HEAT” and the temperature is set higher than the current room temperature.
- Verify the gas shut-off valve is open.
- Check the exterior vent terminal for blockages like snow or debris.
- Furnace Cycles On and Off (Short Cycling):
- A clogged air filter is a common cause. Check and replace if dirty.
- The furnace may be oversized for your home.
- Pilot Light Issues (if applicable):
- A pilot that goes out frequently could indicate a dirty pilot orifice or a faulty thermocouple.
- Water Leaking:
- This is often caused by a clogged or frozen condensate drain line.
- Error Codes on the Thermostat/Furnace Display: Modern furnaces provide diagnostic codes. Check your owner’s manual for the code’s meaning, but most require professional repair.
For any persistent issues or if you’re unsure, it’s always safest to call a professional. Our team can provide Warm and Cozy: Finding Reliable Heating Repair in Smithfield.
Frequently Asked Questions about Direct Vent Furnace Installation
We get a lot of great questions from homeowners in Smithfield and across Rhode Island about direct vent furnace installation. Here are some of the most common ones:
How far does a direct vent need to be from a window?
Clearances are critical for safety. While specifics vary by manufacturer and local code, a general rule is to maintain at least 12-18 inches from any window or door. The vent cap should also be at least 12 inches above the ground or anticipated snow line. There are also specific clearances from building corners and gas meters. Always consult the furnace manufacturer’s manual and local Rhode Island building codes for the exact requirements.
Can I install a direct vent furnace myself?
No. Direct vent furnace installation is a job strictly for licensed professionals. It involves working with gas lines, high-voltage electrical connections, and complex venting that must adhere to strict safety codes. An improper installation can lead to dangerous gas leaks, carbon monoxide poisoning, fire hazards, and will void your manufacturer’s warranty. For safety and peace of mind, always hire a qualified HVAC technician.
What kind of pipe is used for a direct vent furnace?
The pipe material depends on the furnace’s efficiency.
- High-Efficiency Furnaces (90%+ AFUE): These use Schedule 40 PVC or CPVC pipe because their exhaust gases are cooler. These plastic pipes are durable and resistant to the acidic condensate produced.
- Mid-Efficiency Furnaces (80-89% AFUE): These may require special stainless steel or galvanized metal vent pipes to handle hotter exhaust gases.
It is crucial to use the exact type, diameter, and sealant specified in the furnace’s installation manual to ensure safe operation and maintain your warranty.
Conclusion
We’ve explored the intricate world of direct vent furnace installation, from the fundamental principles of safe venting to the meticulous steps involved in setting up these advanced heating systems. We’ve seen how crucial proper installation is, not just for maximizing efficiency and saving on those Rhode Island heating bills, but most importantly, for safeguarding your family from invisible dangers like carbon monoxide. The sealed combustion system, the two-pipe design, and the rigorous attention to detail in every connection all work together to create a safe and comfortable home environment.
The complexity of gas lines, electrical components, and strict local building codes means that direct vent furnace installation is a job best left to the experts. Attempting a DIY installation can not only lead to hazardous situations but will also likely void your manufacturer’s warranty, leaving you without protection if issues arise.
At Advanced Heating & Cooling, we pride ourselves on over 30 years of experience serving Smithfield, RI, and its surrounding communities. Our licensed and qualified technicians are not just installers; they are specialists dedicated to ensuring every direct vent furnace installation is performed with precision, adheres to all safety standards, and provides you with reliable, efficient heat for years to come.
For a safe, code-compliant, and warrantied direct vent furnace installation in the Smithfield, RI area, trust our 30+ years of experience. Contact us today for expert heating installation and repair services.